

Soraka: Cruel Experiments and Berserker’s Buckle
Soraka · from the PoC community · 2026-10-14
Give played allies useful combat keywords and controlled damage, then turn surviving damage and healing into permanent growth.
Build
Overview
 Cruel Experiments supplies the initial wound and
  Overwhelm;
  The Berserker's Buckle rewards damage survived by the champion. Healing then grows your damaged allies through the star power.
This two-relic core has the strongest player score in the collected builds. It adds proactive self-damage and team keywords to the existing rare-relic guide, which relies more on combat to start its growth. The community entry lists only two relics, so the third slot is left open rather than inventing a supported third choice.
The build
Cruel Experiments
When you play an ally with at least two health, deal one to it and grant it Overwhelm and  Impact. This works before the champion is on the board because it is a Power. Its trigger is
  Play: a unit summoned directly does not receive the same effect.
The wound gives healing a purpose, while Overwhelm lets the grown unit push damage through a blocker. It does not protect a low-health unit from later enemy removal.
The Berserker's Buckle
When the carrier survives damage, grant it +2|+2. Cruel's entry damage can trigger that growth, and later controlled damage can do so again. Other allies receive Cruel's effect but do not inherit the equipped Buckle.
Level 19 opens the second Rare slot; upgrade one slot to Epic for Cruel. This listed two-piece core does not require the third slot at level 30.
How to play
Keep cheap allies and healing you can use.  Star Shepherd rewards healing, while
  Mountain Goat supplies buff access and can become a useful Overwhelm attacker. Prioritize a safe board before planning a large heal.
Play Soraka when she can survive the entry and enemy response. Use her Support healing on a damaged ally; once levelled she also heals herself on attack. Arrange attacks so the ally she supports is the one that needs the healing, not a full-health unit that gains nothing from it.
 Astral Diffusion gives recurring interaction, and
 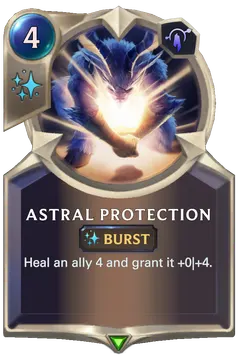 Astral Protection can keep a damaged unit alive while improving its stats. The star power requires healing a damaged ally. Increasing maximum health or targeting an already full-health unit is not a substitute for actual healing.
Drafting and alternatives
Take cheap useful allies, efficient healing and ways to survive the opening.  Stargazer provides another payoff for healed units. You already get Overwhelm on qualifying played allies, so another team-Overwhelm relic is less urgent than mana, defense or a reliable payoff.
 Sentinel's Plate is a later damage-survival option that adds keywords; it still needs the champion present and alive.
  Celestial Staff supports a separate healing-and-Rally plan. Pick the third slot for the adventure: only these two relics are the agreed core.
Star-power checkpoint
Three-star  Flourish II grants stats according to healing on a damaged ally, capped at +3|+3 per trigger. Two-star
  The Stars Answer supplies starting mana and Astral Diffusion. Six-star
  Flourish III adds free Falling Comets after accumulated healing; it is optional for the two-piece damage-and-heal engine.
Sources
- Soraka damage-survival relics by u/7eleven94, 2026-04-14, 44 points (observed 14 Oct 2026).
- Cruel Experiments suggestions by u/Terseph, 2026-02-15, 3 points (observed 14 Oct 2026).
- Player-voted builds, local snapshot collected 13 Oct 2026.
- Champion guide builds and recorded clears, local snapshot collected 13 Oct 2026.
- Champion mechanics and level rewards, local data checked 14 Oct 2026.